Craft night does not need a big budget. Most kids are happy with a few cheap supplies, a clear table, and permission to make a mess. The hard part is finding projects that look good on a shelf without a pile of receipts.
These Dollar Tree crafts for kids fix that. Each one starts with low cost basics from a dollar store craft aisle, like craft sticks, felt, stickers, markers, paint, and plain plastic pumpkins. Stock changes from store to store, so check your shelves before you plan.
You will find easy projects for little hands, like Play-Doh critters and sticker houses. You will also find bigger ones where kids pick the colors and a grown-up runs the glue gun. Every craft below comes from a real photo, so you can see what the finished piece can look like before you start.
Keep your coffee money in your pocket and pick the one that fits your afternoon.
Craft Stick Haunted Houses Kids Cover in Stickers
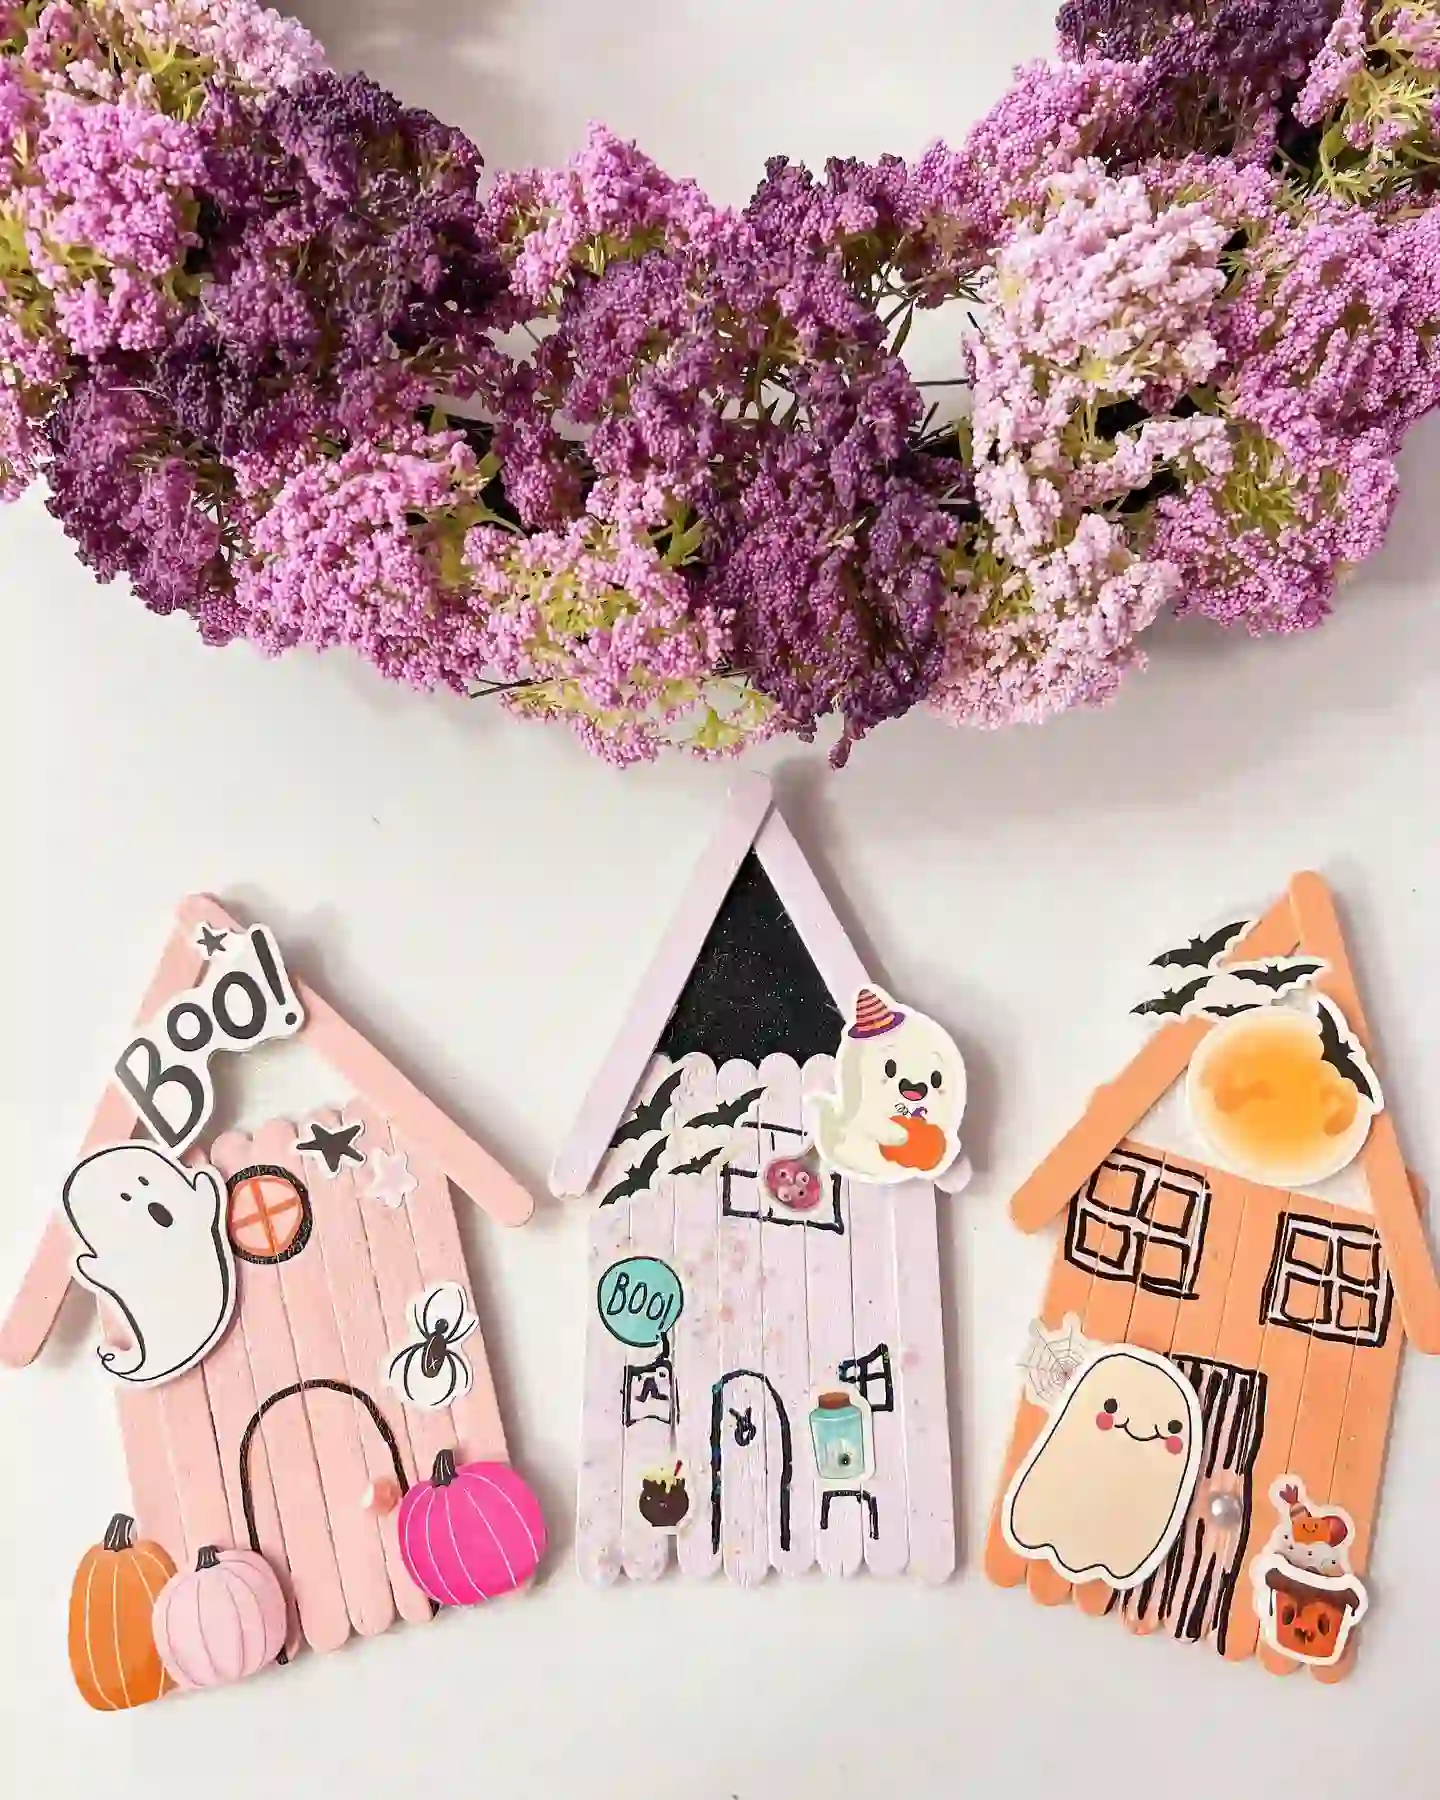
Little haunted houses made from craft sticks are a great first project for kids who love stickers. Each house in the photo has a pointed stick roof, a row of stick walls, and a door and windows drawn in black marker. Then the fun part starts.
- Paint the sticks first, one color per house. Blush pink, soft lilac, and peach all show up here.
- Glue the roof sticks at an angle so the top comes to a point.
- Draw arched doors and square windows with a black marker. Wobbly lines look spooky anyway.
- Stick on ghosts, bats, spiders, and tiny pumpkins until the house looks lived in.
The lilac house has a black glitter triangle in the attic, which makes a great night window.
Play-Doh and Feather Critters for Toddler Table Time
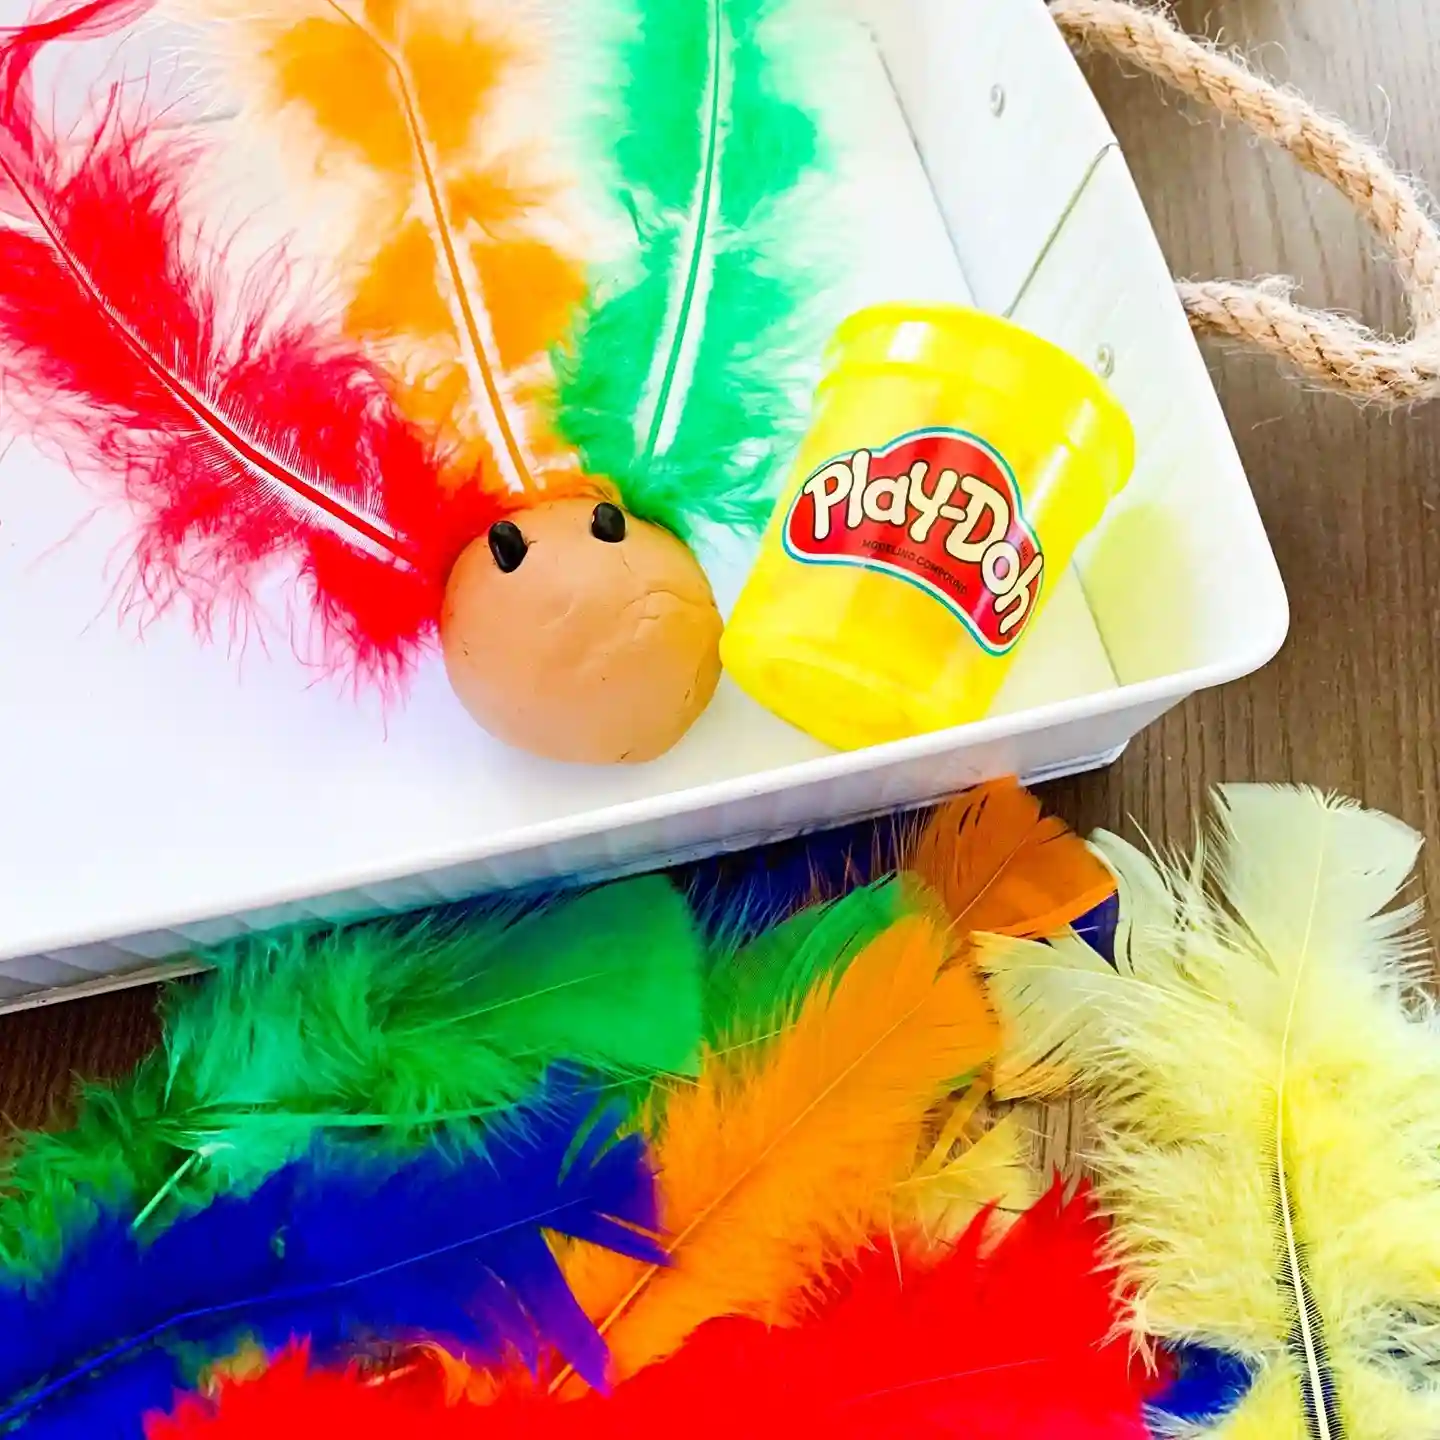
This one takes about two minutes to set up. Roll a ball of dough, press in two small black dots for eyes, then poke bright feathers into the top. The critter in the photo has red, orange, and green feathers fanned out like a crest, and a pile of loose feathers sits nearby for more.
- Put a white tray on the table so the colors pop and the mess stays put.
- Hand your child a ball of dough in any color.
- Pour out feathers in red, orange, green, blue, and yellow.
- Let them poke and build. Every critter comes out different.
Squish it flat and start over. No glue to dry.
⚠️ Watch Out
Feathers and tiny dough eyes are small. Stay at the table with toddlers who still put things in their mouths.
Felt Pumpkin and Witch Cat Faces Built in Layers
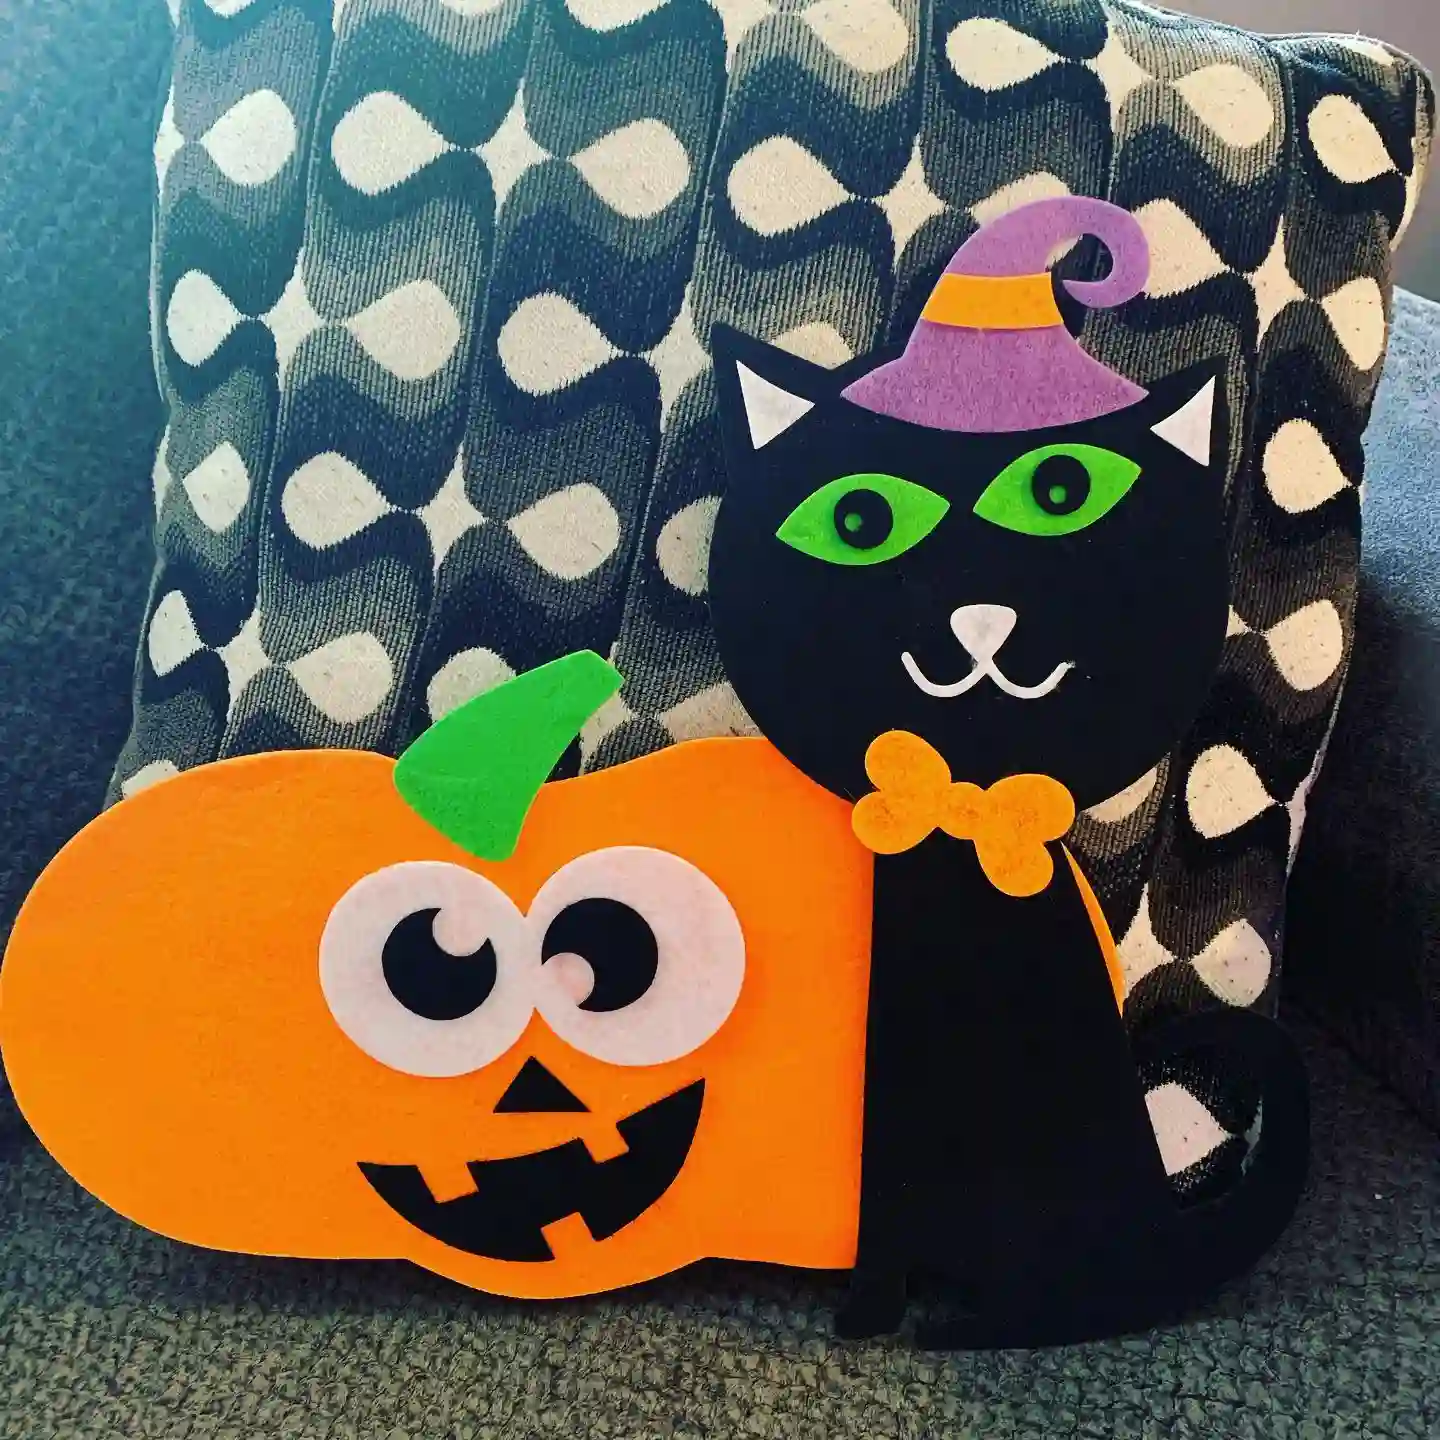
Pick a side. The photo shows two felt friends sitting together, a grinning orange pumpkin and a black cat in a purple witch hat. Both are made of flat shapes laid on top of each other, so kids work like puzzle makers.
The pumpkin’s big white eyes with black pupils give it a silly look, and moving the pupils changes the mood. The cat’s green eyes and orange bow tie keep it friendly instead of scary. Lean one on a couch pillow like the photo, or hang it on a door.
| 🎃 The Pumpkin | 🐈⬛ The Cat |
|---|---|
| Orange base shape | Black base shape |
| Big white eyes, black pupils | Green eyes, white ears and nose |
| Jagged black smile, green stem | Purple witch hat, orange bow tie |
A Starry Night Pumpkin With Two Friendly Ghosts
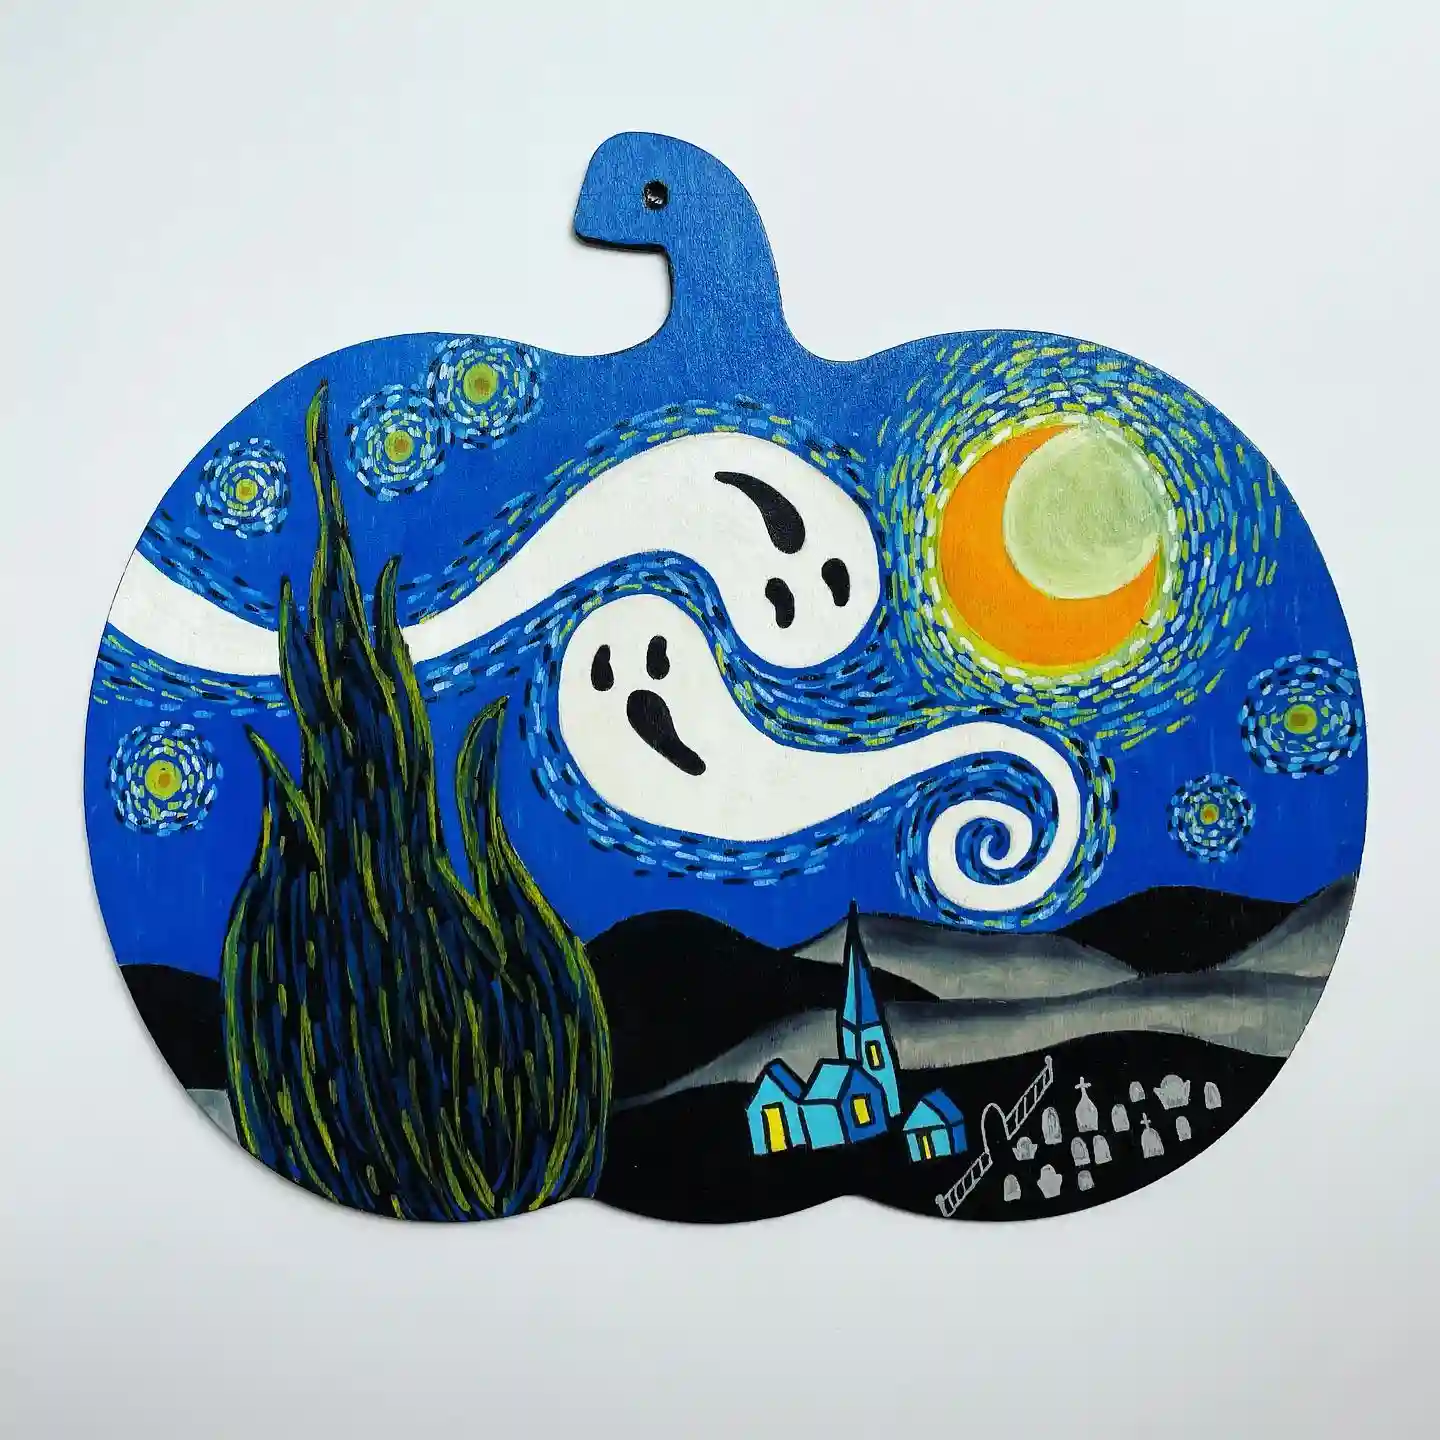
Older kids who like art class will go for this one. A flat pumpkin cutout turns into a night sky with deep blue paint, swirls of short light blue and yellow green dashes, and a white ribbon of cloud holding two ghosts. An orange crescent moon glows in the corner.
The details sit low on the pumpkin: a tall dark green tree, a little blue church with lit windows, and a row of gray gravestones on the hills. Let the blue coat dry fully before adding dashes, or the colors will muddy.
Kids do not need to draw well. Short dashes in a circle make a star, and one big spiral makes the wind.
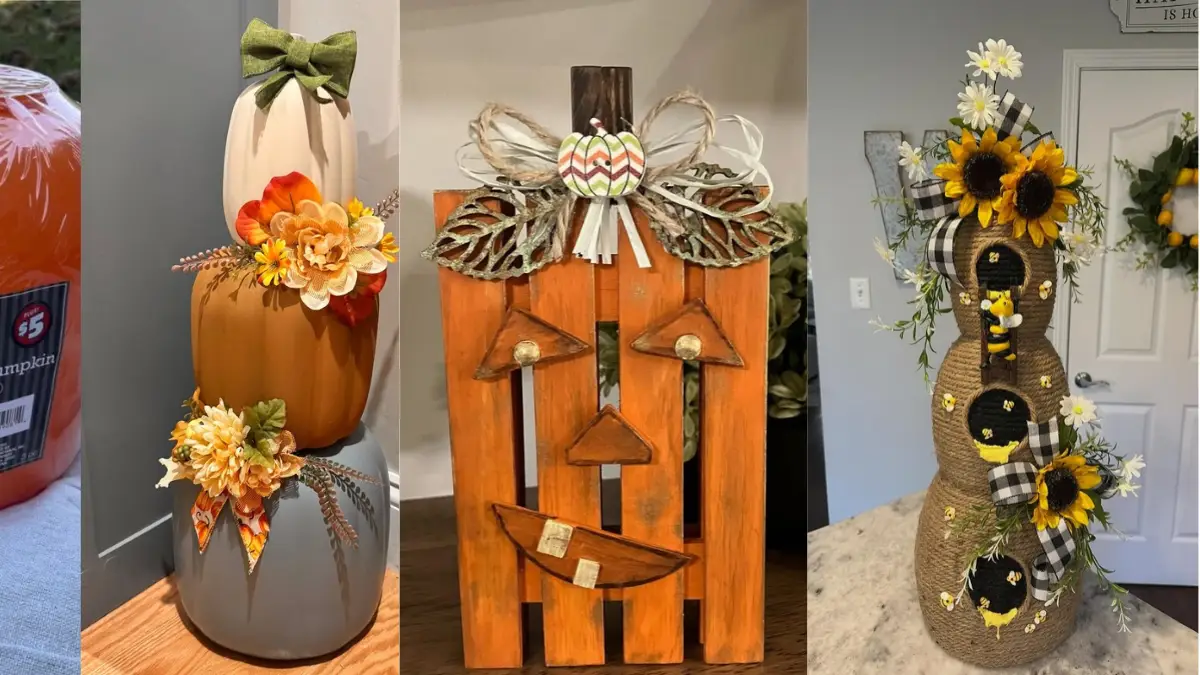
A Slat Pumpkin With a Triangle Face and Twine Bow
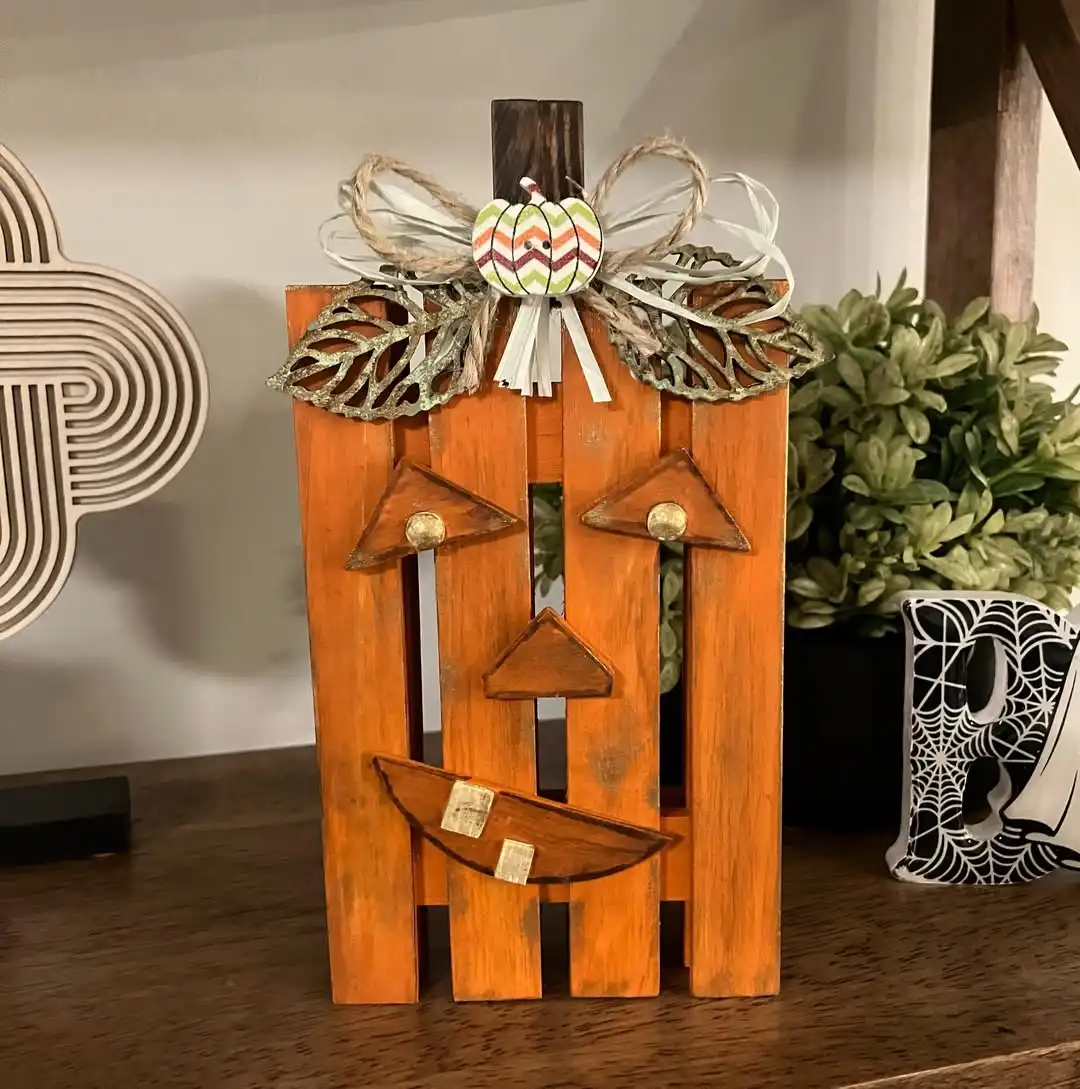
Sometimes a pumpkin is just a row of sticks. Bold orange slats stand side by side with small gaps between them, and a dark stem rises on top. The face is cut from triangles: two eyes with a gold tack in each, a small nose, and a wide crescent smile with two tan squares for teeth.
The gaps let a little of the green plant behind it show through, which gives the face some depth. Twine, ribbon, and leaf shapes sit on top like a messy hair bow.
Use a glue gun for the metal bits, and keep that job for the grown-up.
Recreate this look
Turn a Plain Orange Stacking Pumpkin Into a Soft Fall Tower
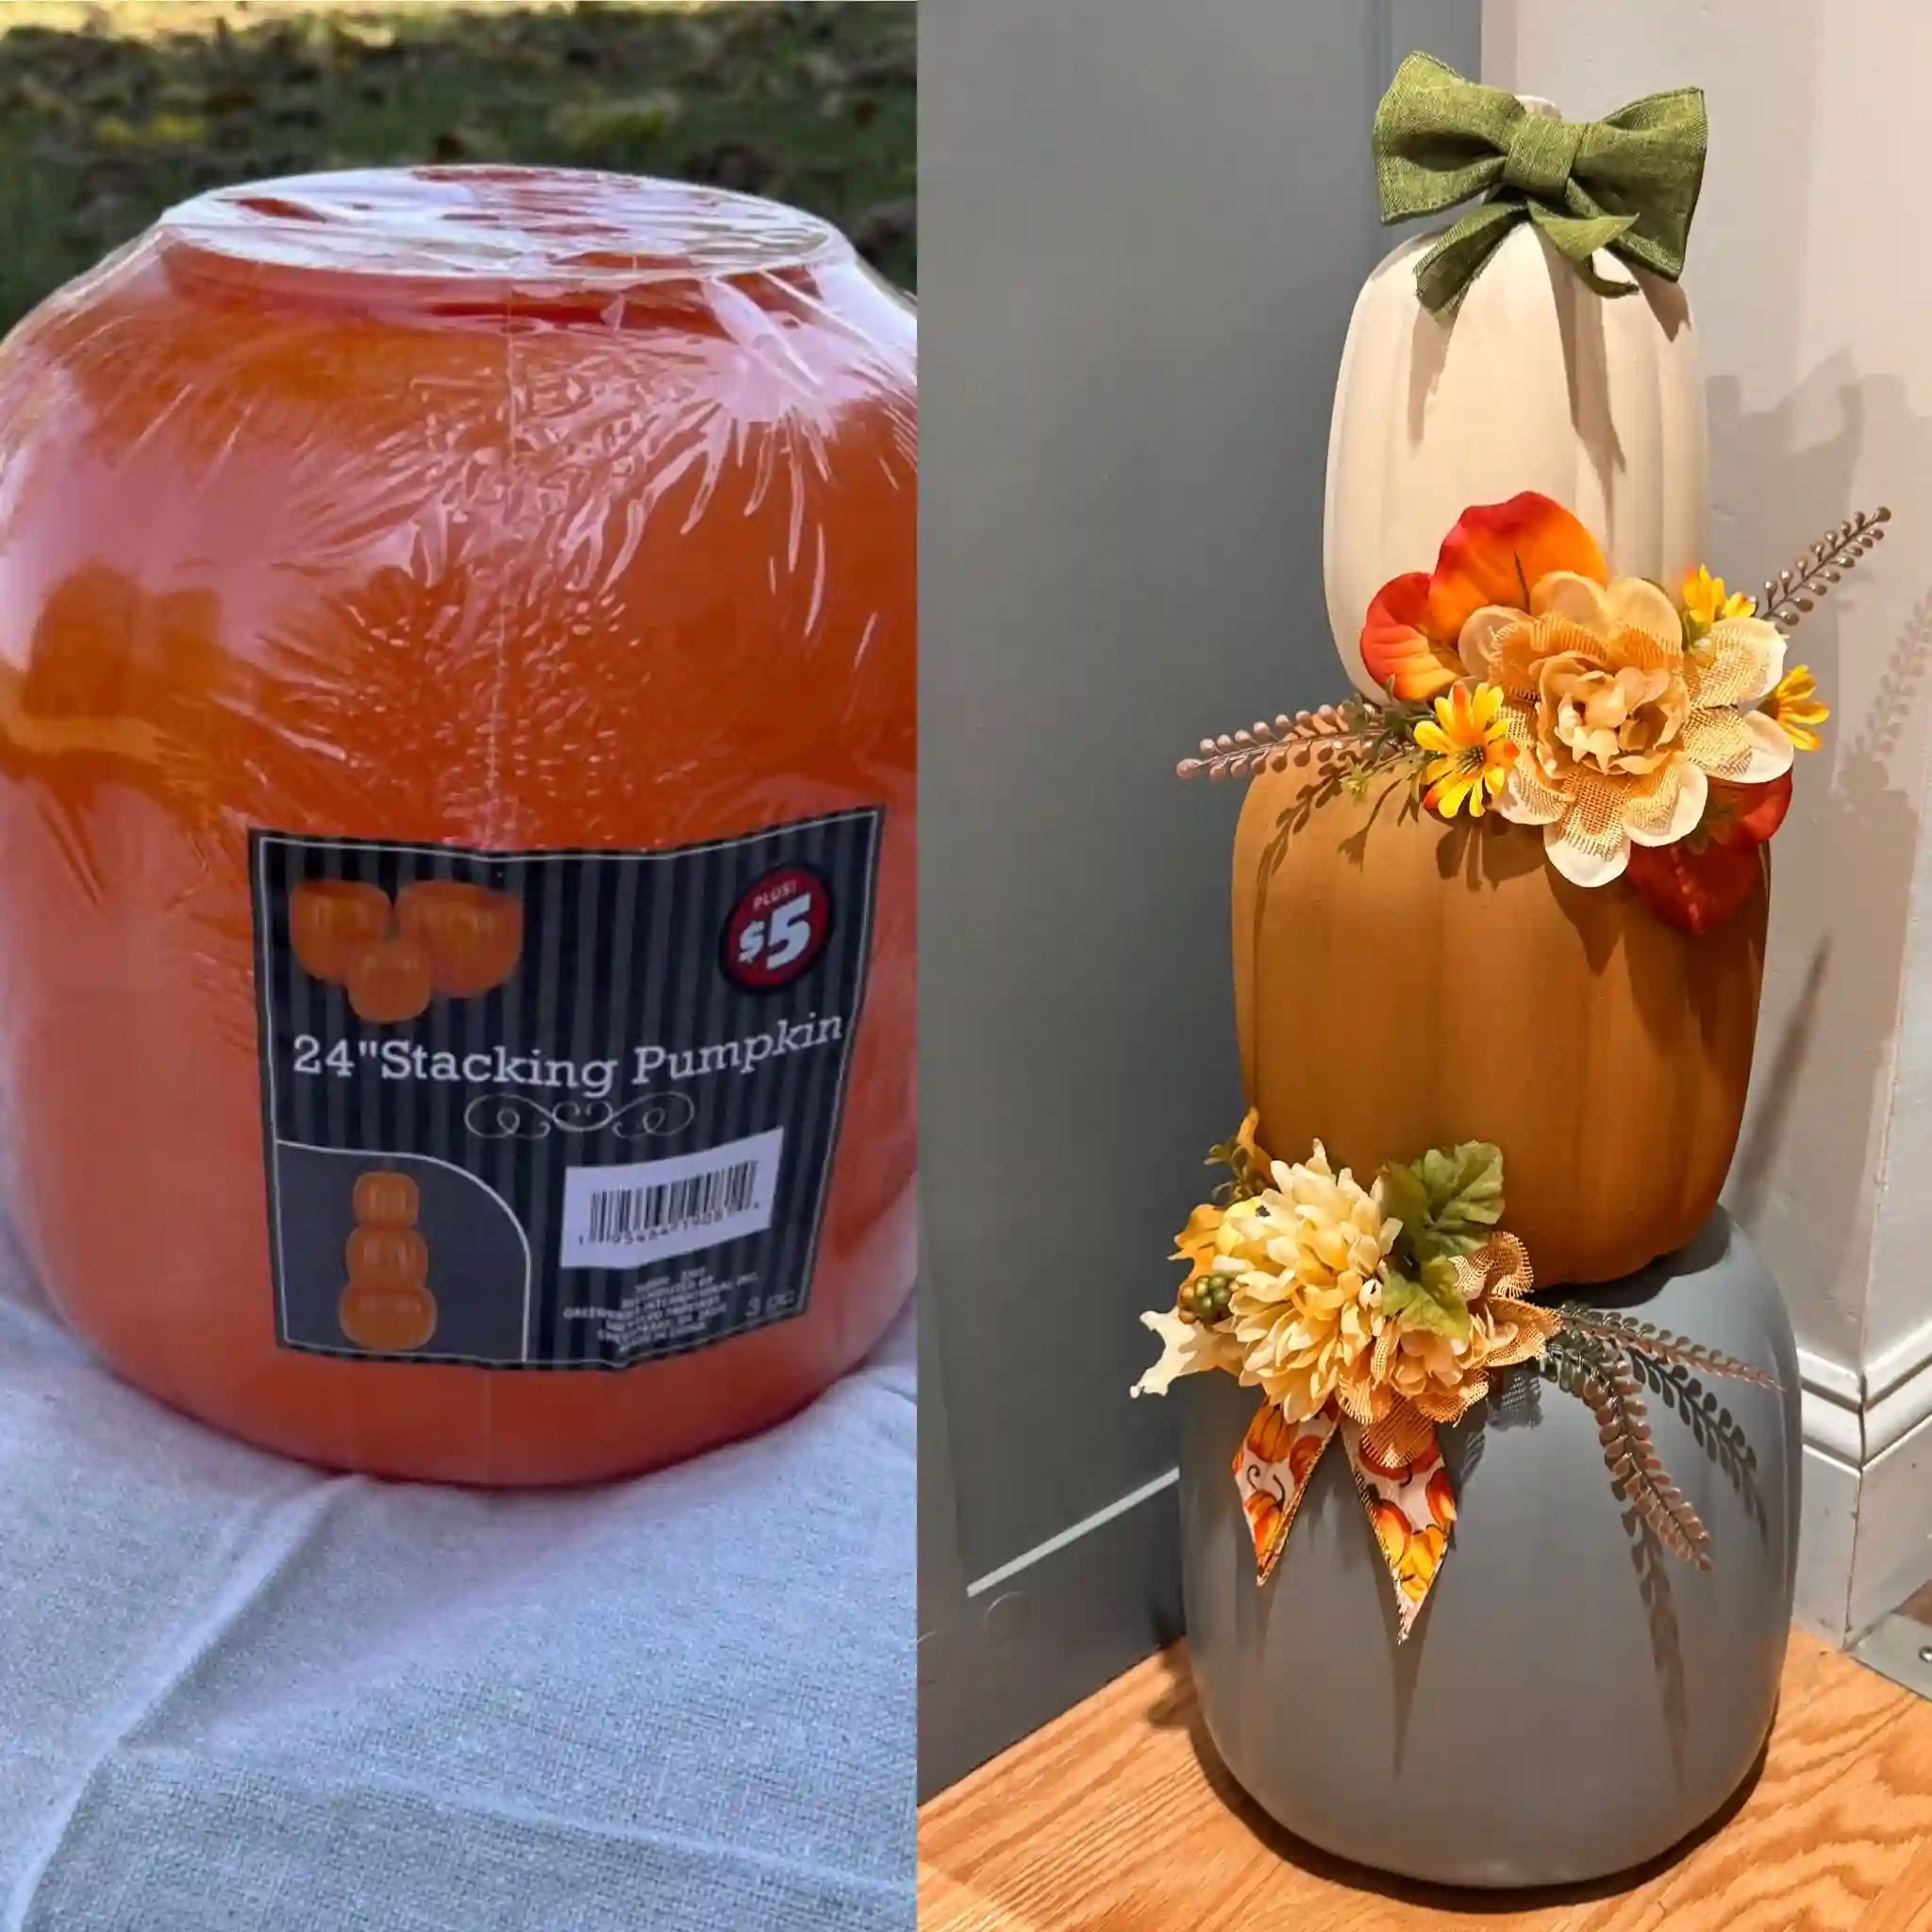
The tag in the left photo reads $5 for a three piece stacking pumpkin set, so this is one of the bigger spends on the list. It also gives you the most height for the money.
On the right, a set like it has been painted cream, terracotta, and gray blue, then stacked. Fall flowers, small sprigs, and a pumpkin print ribbon sit where the pumpkins meet, and a green bow tops the cream one. Kids can sponge on the paint. A grown-up can place the flowers.
Orange to cozy in a few coats.
Bright orange plastic pumpkins in shrink wrap.
Cream, terracotta, and gray blue pumpkins stacked with fall flowers and a bow.
White Pumpkin Snowmen With Rusty Stars and Plaid Scarves
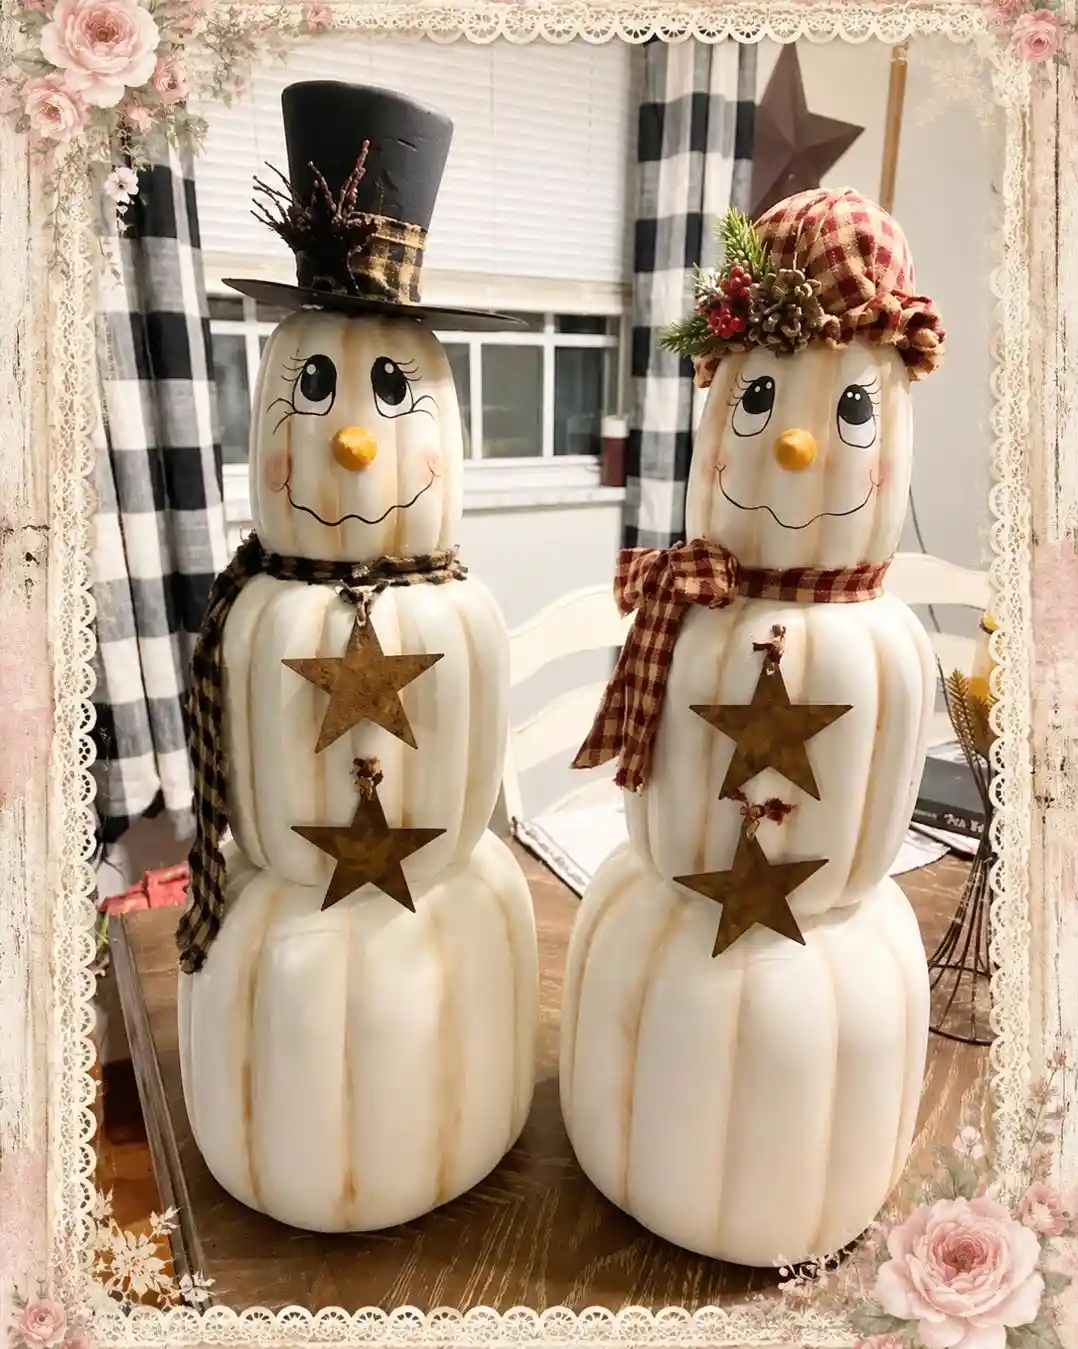
They look like snowmen, but they are stacks of white ribbed pumpkins. Each one has a painted face with big lashes, pink cheeks, and a round yellow orange nose. One wears a black top hat with a plaid band. The other has a red and tan check cap with greenery, berries, and a pinecone. Rusty metal stars hang down the middle of both.
Give kids the jobs that fit them:
- Pick the scarf fabric.
- Choose a top hat or a cozy cap.
- Tie the stars on with string.
Dab on the pink cheeks.
Pick fabric and tie on the stars.
Paint the small eyes and lashes.
Stack the tall pumpkins and glue the hats.
A Twine Wrapped Beehive Tower With Tiny Bees
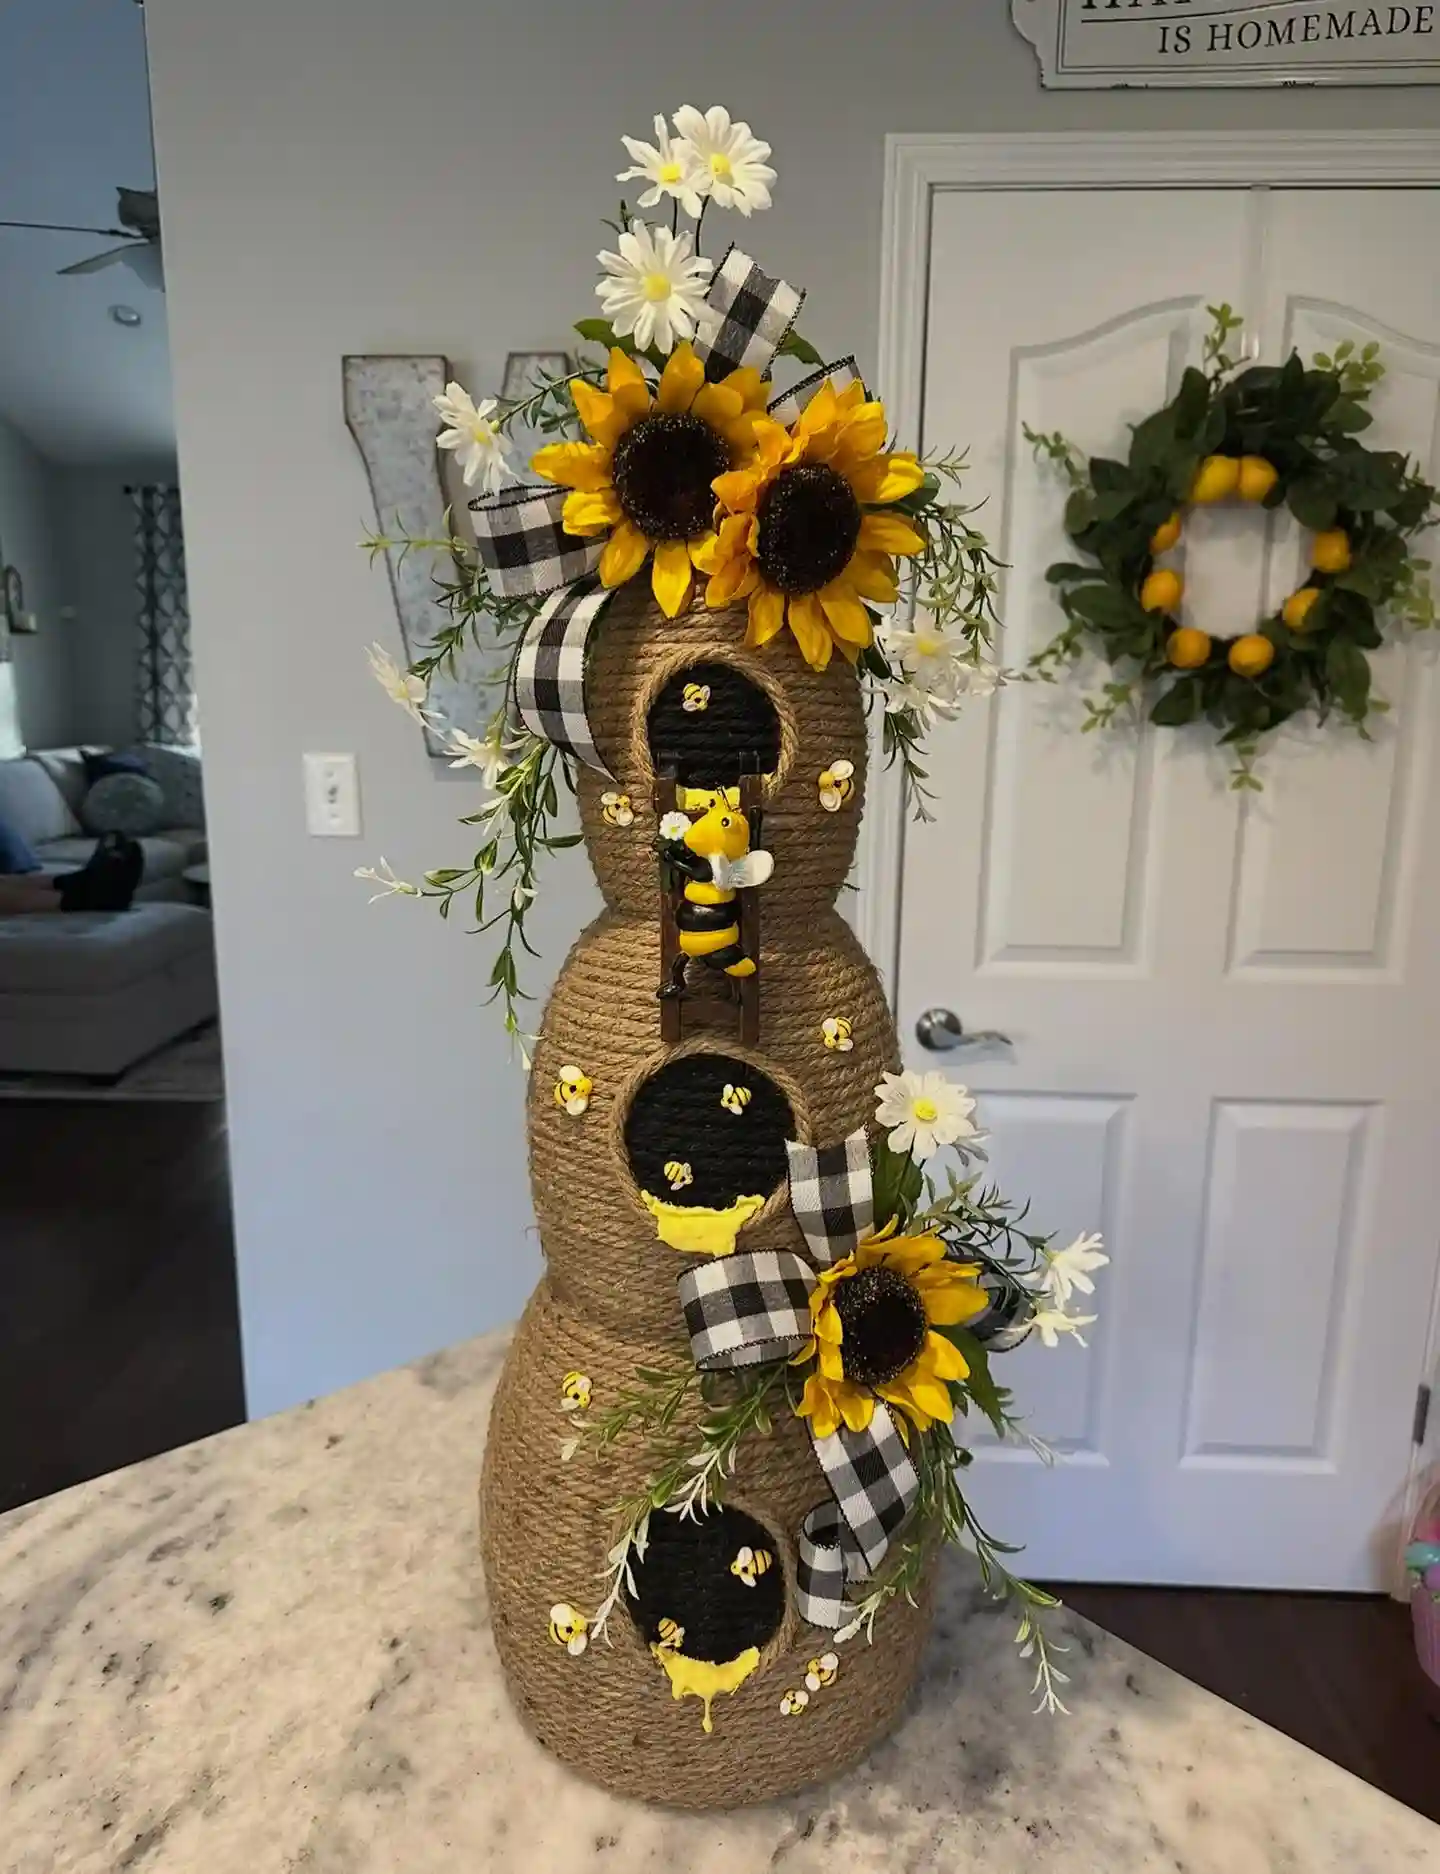
Bees are the easy part. Three round, stacked forms wrapped in jute twine make the hive. Black round doors on the sides each hold a few tiny bees, and yellow honey drips below two of them. A small ladder with a bee carrying a flower leans up the middle.
Sunflowers, white daisies, greenery, and black and white check ribbon spill down from the top. Wrapping takes patience, so split it into two sittings with kids.
Wrap the stacked round forms in twine, one row at a time.
Add black circle doors, yellow honey drips, and tiny bees.
Finish with sunflowers, daisies, and check ribbon.
Save Your Favorite Dollar Tree Crafts for Kids
Pick one project and gather the supplies this week. Start with the easy ones, like the Play-Doh critters or the sticker houses, then work up to the pumpkin towers when you want a bigger weekend project. Prices and stock change by store, so check the aisles and grab a few spares of the small stuff, like stickers, felt, and craft sticks.
If these ideas helped, save this post to your fall crafts or kids activities board on Pinterest. It will be waiting the next time someone says they are bored.
Related reading
- Rainy day activities for kids — the full indoor ideas guide, sorted by age
- 15 rainy day activities for kids — indoor ideas that keep everyone busy
- Toddler activities at home — eleven no-buy ideas with little cleanup
- Christmas activities for kids — eleven easy traditions to repeat every December
Part of our complete guide
Everything in one place: the full Rainy Day Activities for Kids guide, with every related article.