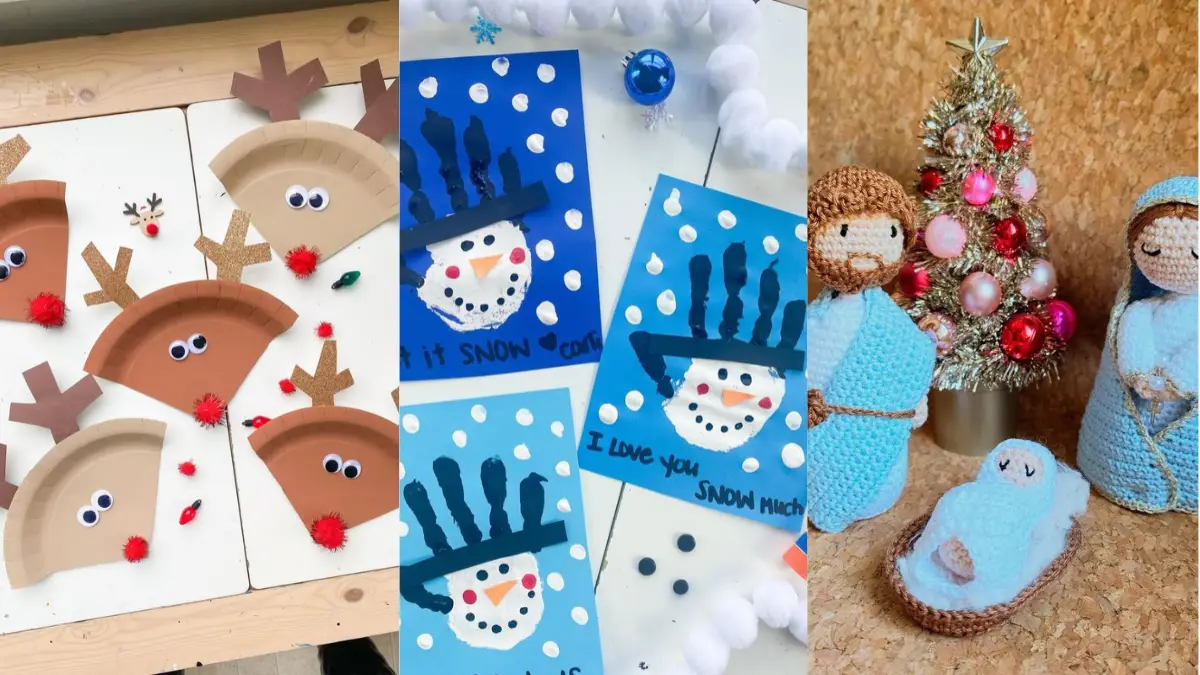
Babies grow so fast that last month’s hand is already too small. Christmas is a good time to catch it. A painted handprint on a card, a tiny footprint reindeer, or a wood slice ornament with the year written on the back can hang on your tree for decades.
This list of baby christmas crafts mixes handprint keepsakes with homemade ornaments, plus a few easy projects for toddlers and older siblings. Each idea comes from a real craft table, with notes on what to copy and what to change when the youngest helper still puts everything in their mouth.
You will find cards, ornaments, a soft crochet nativity, and a pom pom tree that sticks right on the wall. Most use paper, paint, and glue you may already own. Where a project has small parts like buttons or googly eyes, we flag it so an adult can handle that step.
Pick one for this weekend. Save the rest for the next rainy afternoon in December.
Handprint Snowman Cards Where the Fingers Become a Top Hat
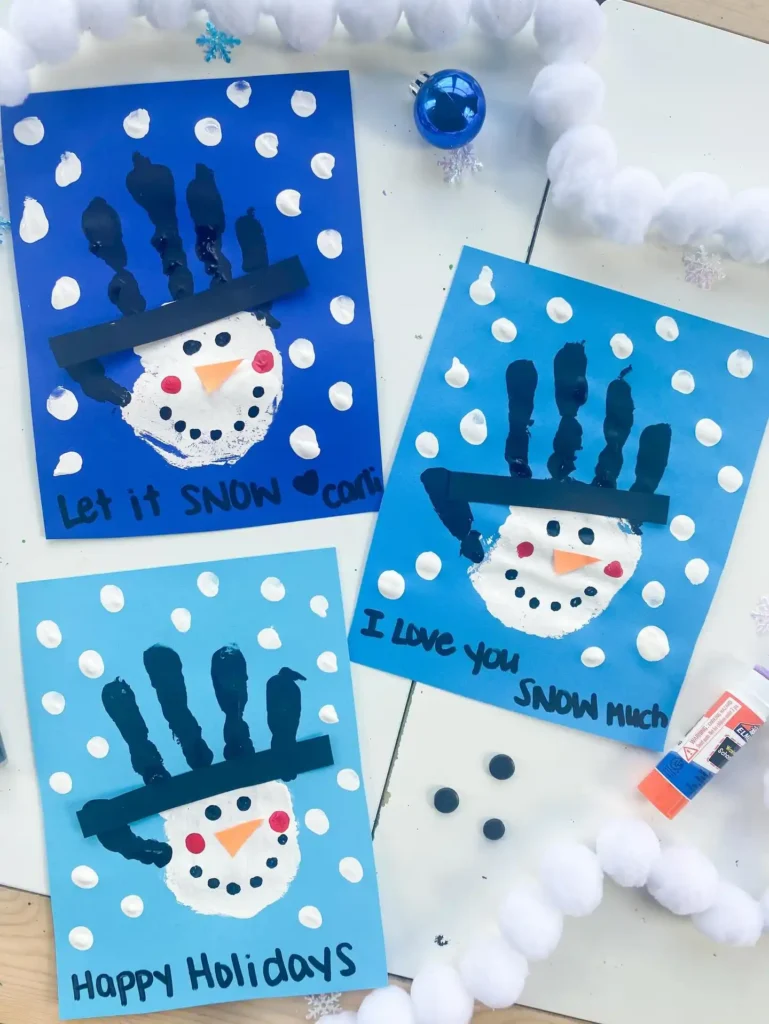
Fingers pointing up make a tall black top hat. That is the whole trick behind these three cards.
- Press the black hand first, with an adult guiding a baby’s wrist.
- Paint a round white head right under the palm.
- Glue a thin strip of black paper across the base of the fingers for the brim.
- Add an orange paper triangle nose, red cheek dots, and a dotted face in marker.
- Dot fingertip snow all around the edges.
Write a short message at the bottom, like the ones in the photo, and add the year. Future you will want it.
Paper Snow Globes With a Fingerprint Light String Base
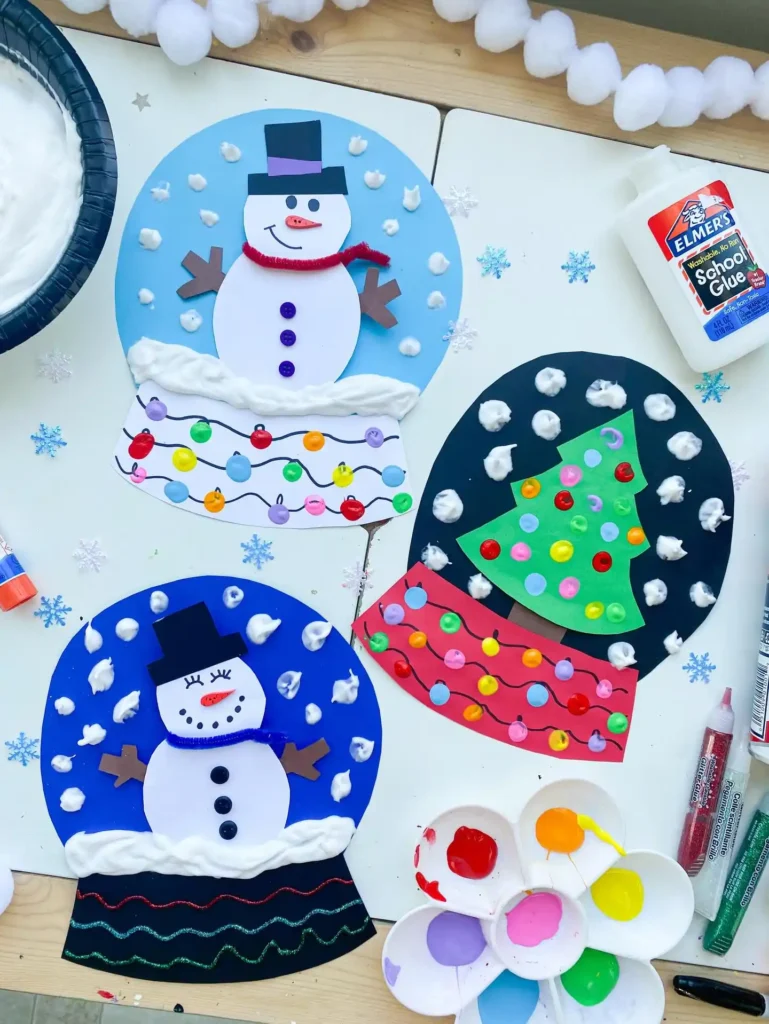
Cut one big circle, add a half-moon base, and you have a snow globe that can hold any scene. The blue globe in the photo has a paper snowman in a black hat with a pipe cleaner scarf. The black one holds a green tree covered in paint dots.
The base is the best part. Draw wavy lines with a marker, then press fingertip dots along them for colorful bulbs. A baby’s fingertip is just the right size for one bulb. The darkest globe skips paint and uses wavy lines of glitter glue instead.
Puffy white snow sits along the bottom, with smaller white dots floating in the sky.
Recreate this look
Paper Plate Reindeer With Glitter Antlers and Pom Pom Noses
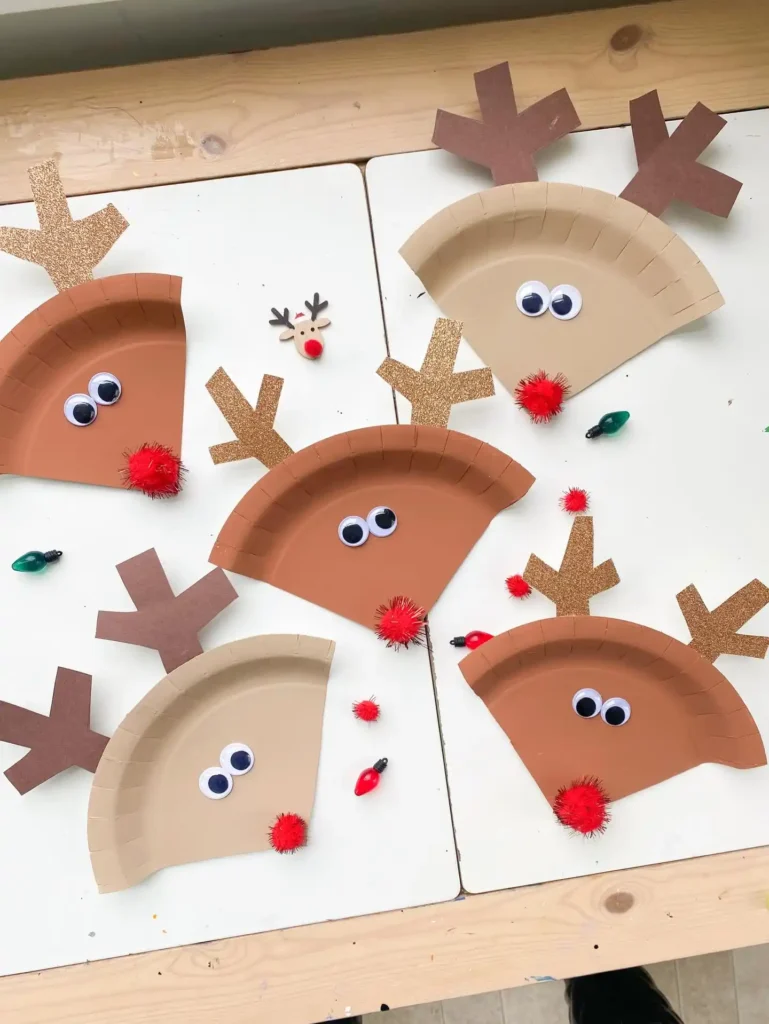
Dark brown plate or tan plate? Both work. The dark brown reads as a classic reindeer, and the tan one looks softer, almost like a fawn. Each face is half a paper plate, two big googly eyes, and a sparkly red pom pom nose at the point.
The antlers do the heavy lifting. Plain brown paper looks neat, and glitter paper catches the tree lights. Cut a simple branched shape and glue two behind the top edge.
Googly eyes and pom poms are small, so a baby should only watch this one.
Let an adult glue the eyes and the nose.
Keep spare googly eyes and pom poms in a closed bag.
Leave loose pom poms within a baby’s reach.
Let a baby carry or chew the finished reindeer.
Zigzag Paper Tree Cut With Craft Scissors
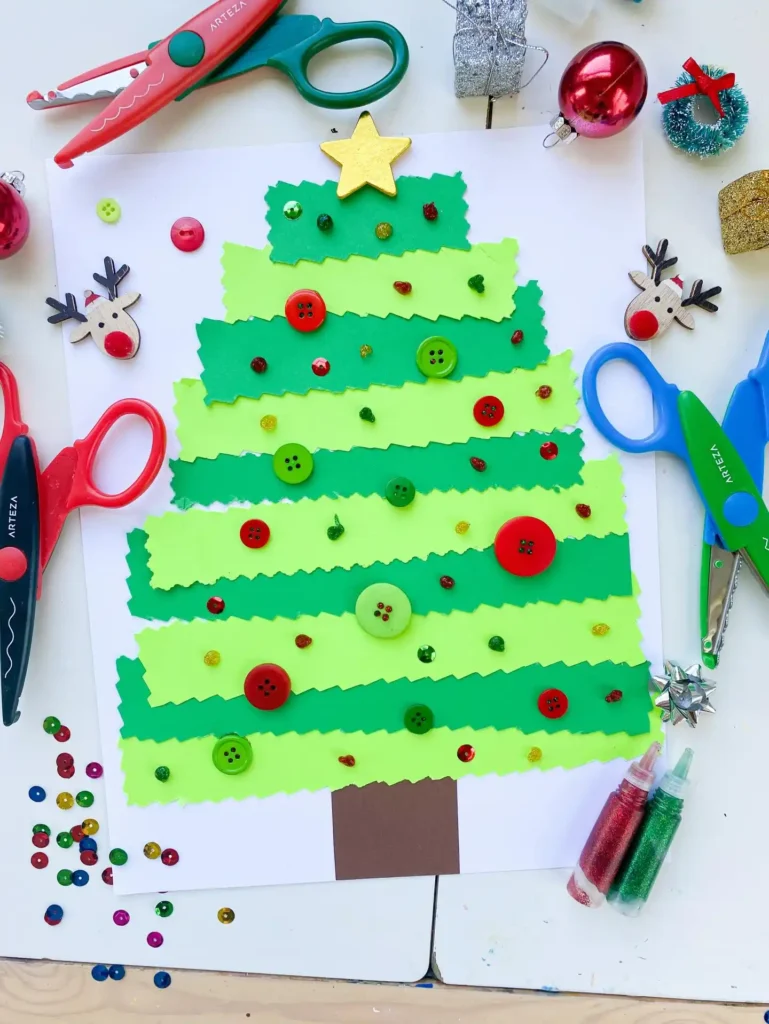
Two shades of green paper, a pair of zigzag craft scissors, and a plain white sheet are all this tree needs. Each strip is a little longer than the one above it, and the light and dark greens take turns so every layer stands out. Buttons, sequins, and glitter glue dots work as ornaments, with a gold star on top and a brown paper trunk below.
For a baby, swap the buttons for glitter glue dots or flat stickers.
Cut strips of light and dark green paper with zigzag scissors, each one a bit longer than the last.
Glue the shortest strip at the top, then layer the rest downward, switching colors each time.
Add a brown paper rectangle at the bottom for the trunk.
Dot on the ornaments, then top it with a star.
Wood Slice Snowman Ornaments With Ribbon Scarves
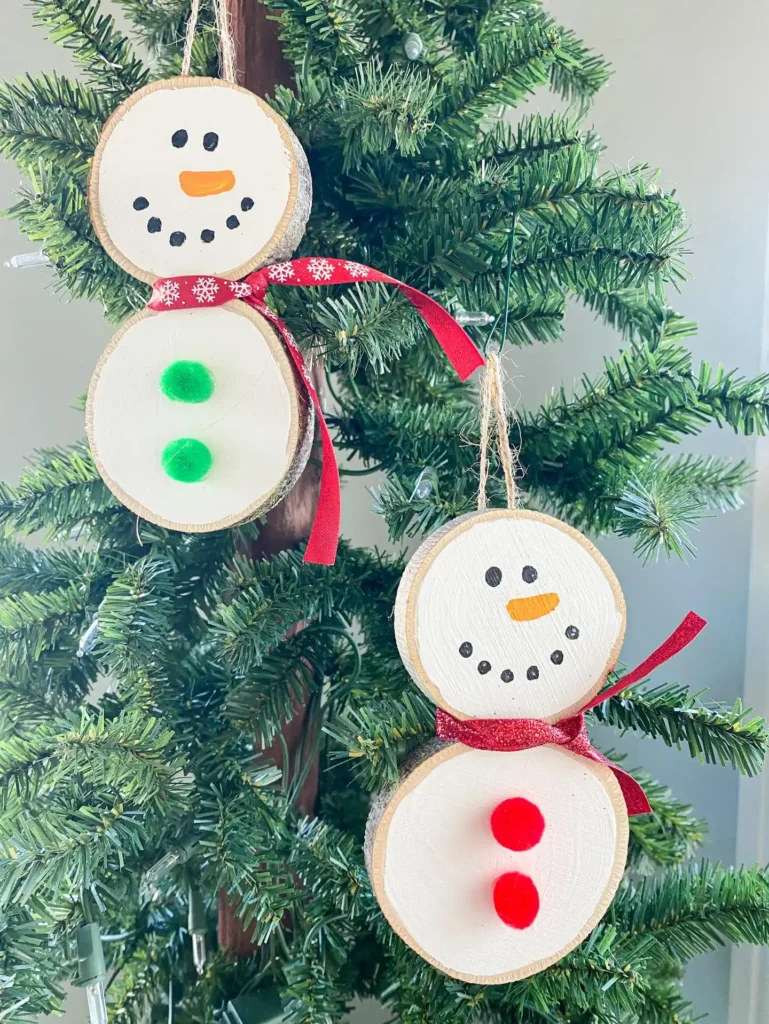
Two wood slices stacked one above the other make a snowman body with almost no work. Paint both a creamy white, dot on a face, and tie a ribbon scarf where they meet. The two in the photo use a snowflake print ribbon and a glittery red one, with green or red pom poms for buttons and twine for the hanger.
Make it a keepsake. Write the baby’s name and the year on the back with a paint pen. Glue the pom poms on firmly, since they are small parts.
Two plain wood slices and a pile of supplies.
A snowman with a ribbon scarf, pom pom buttons, and a twine loop, ready for the tree.
Cupcake Liner Snowman on Purple Paper
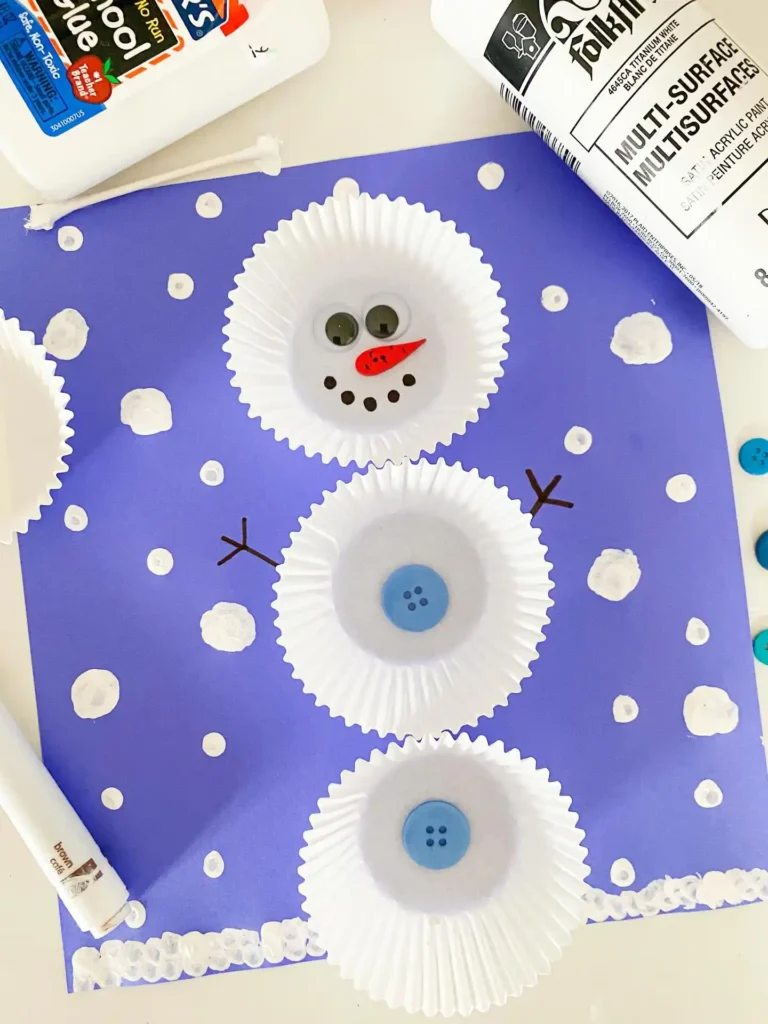
Three white cupcake liners stack into a snowman faster than you can draw one.
- Glue three liners in a column down the page.
- Give the top one googly eyes, an orange nose, and a dotted smile.
- Press a blue button into the middle of each lower liner.
- Draw twig arms with a brown marker.
- Dab on snow with a cotton swab dipped in white paint, and add a snowy ground along the bottom.
Purple paper makes the white pop. The eyes and buttons are small parts, so an adult should place them.
💡 Quick Tip
Let the white paint dots dry before you glue the liners down. Wet paint under a liner can smudge through the white.
A Wall Tree Where Toddlers Press On Their Own Pom Poms
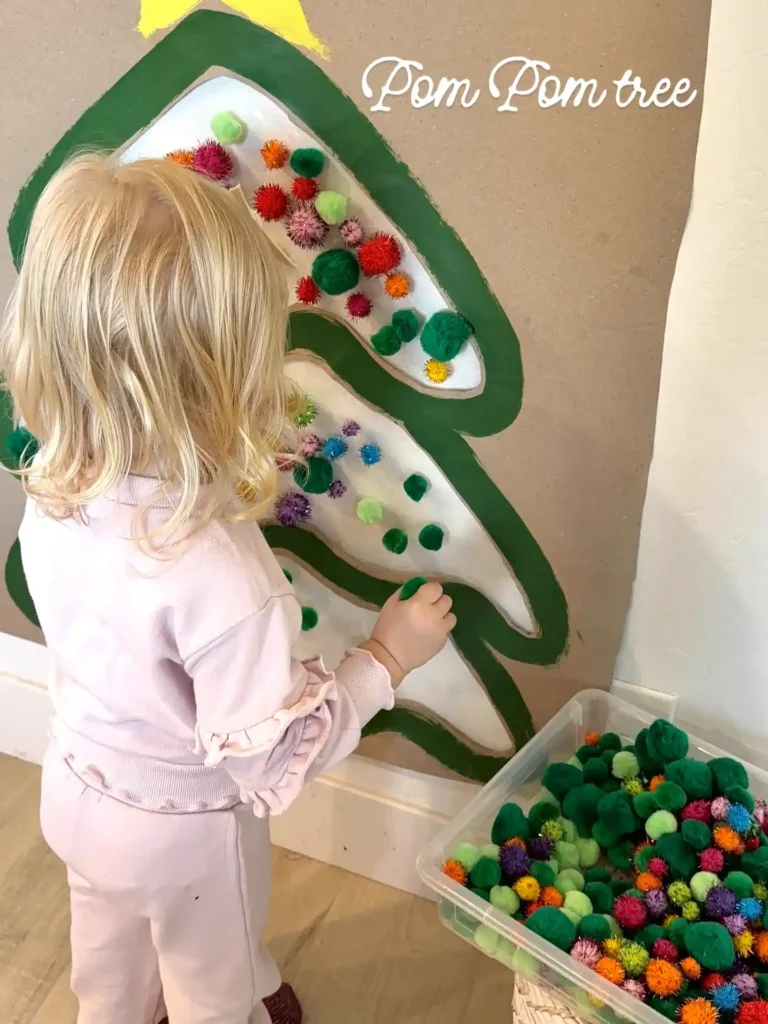
A big tree shape on the wall gives a toddler a whole new way to decorate. In the photo, a green painted outline frames a white center, and the pom poms seem to stick right onto it. Greens, reds, and sparkly mixes sit in a clear bin below, so the little decorator can grab and press.
Stand close. Pom poms are a choking risk for babies and young toddlers, so this one needs an adult within arm’s reach the whole time.
A Soft Crochet Nativity Set With a Tiny Manger
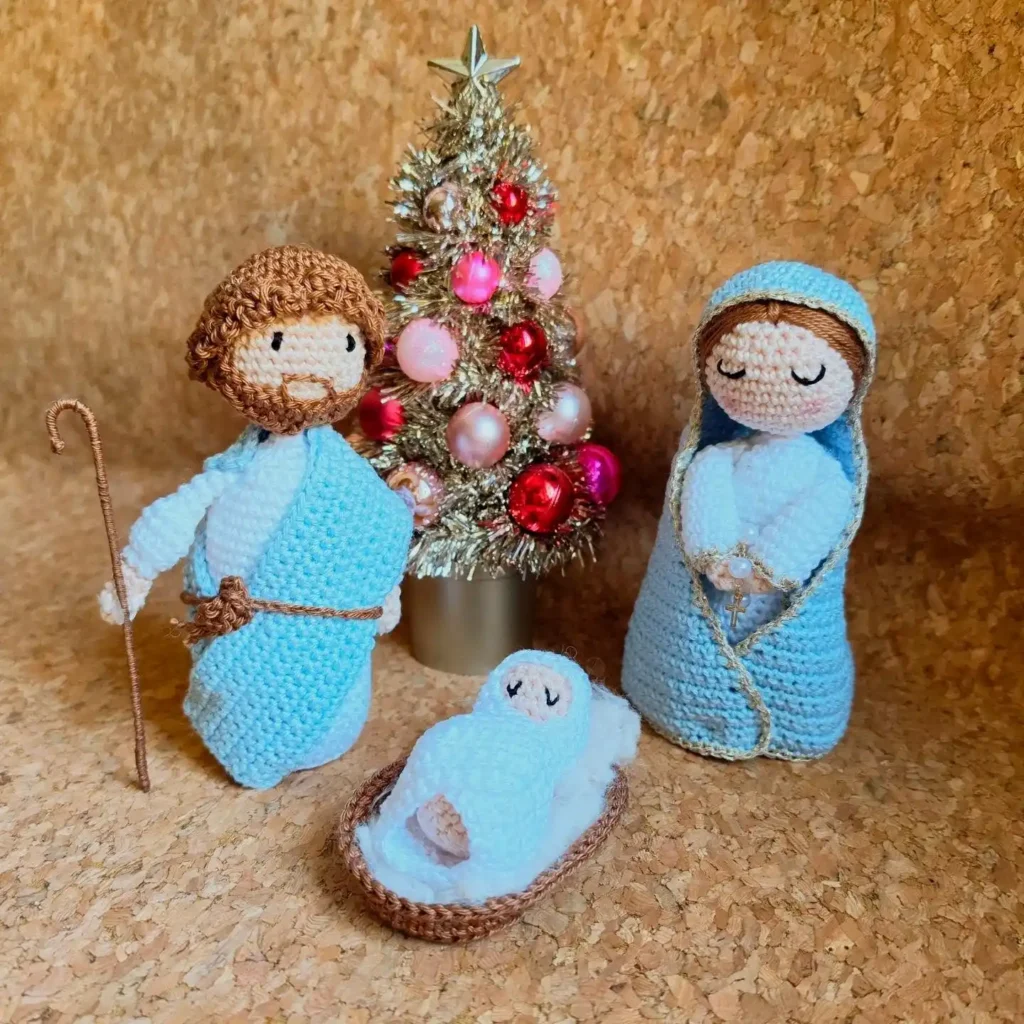
Make the whole set, or start with just the baby in the basket? Both are good plans. The photo shows Mary, Joseph with a curved staff, and a wrapped baby in a woven basket, all in soft blue and white yarn. A small gold tinsel tree with pink and red ornaments stands behind them.
The faces look stitched, not made with plastic eyes, which is easier to live with in a house with a baby. Still check the seams before any play.
| Whole set | Baby and basket first |
|---|---|
| Three figures and a manger. | One small piece to learn on. |
| Needs patience and steady hands. | Easier to finish in a few evenings. |
| A display to pass down. | Can grow into the full set next year. |
Handprint and Footprint Cards: Baby Christmas Crafts Grandparents Keep
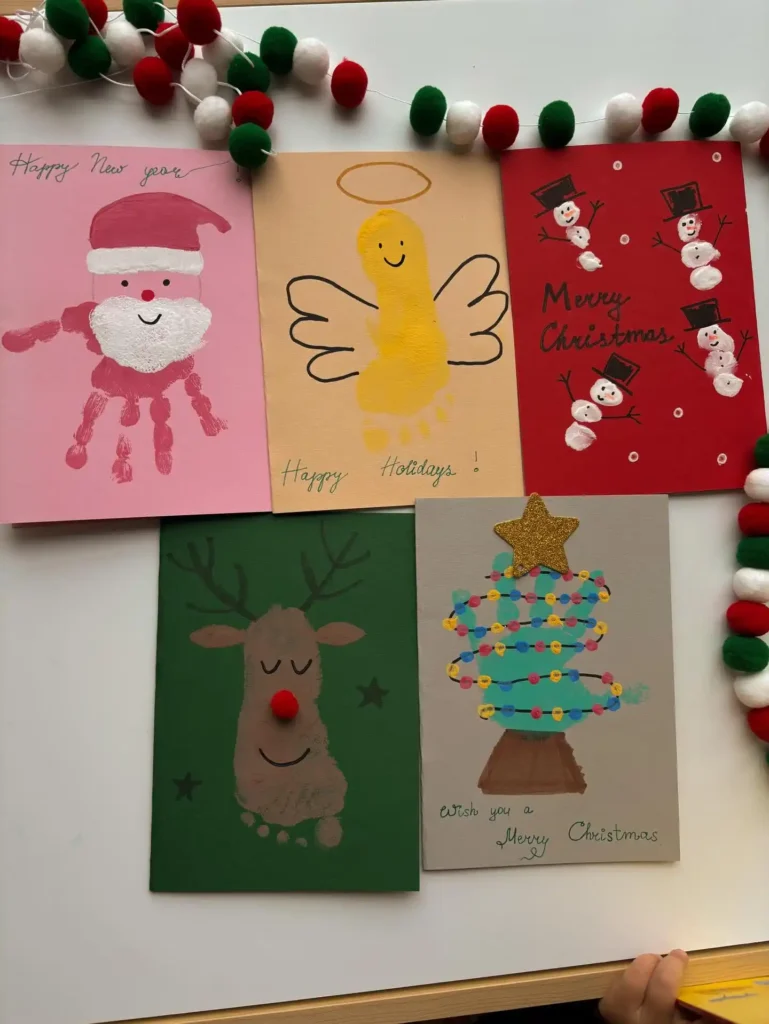
Five cards in the photo, five different prints:
- Santa: a pink handprint with a painted white beard and hat trim.
- Angel: a yellow footprint with a drawn halo and wings.
- Snowmen: stacks of white fingertip dots on red paper.
- Reindeer: a brown footprint with a red pom pom nose.
- Tree: a teal handprint wrapped in fingertip lights, topped with a glitter star.
Footprints are often easier than hands with a newborn, since tiny fists stay closed. Write the date and the baby’s age in the corner, and keep wipes within reach.
A real print shows exactly how small your baby is right now, and that is what makes a card worth keeping.
Paper Strip Reindeer and Tree Cards Little Hands Can Glue
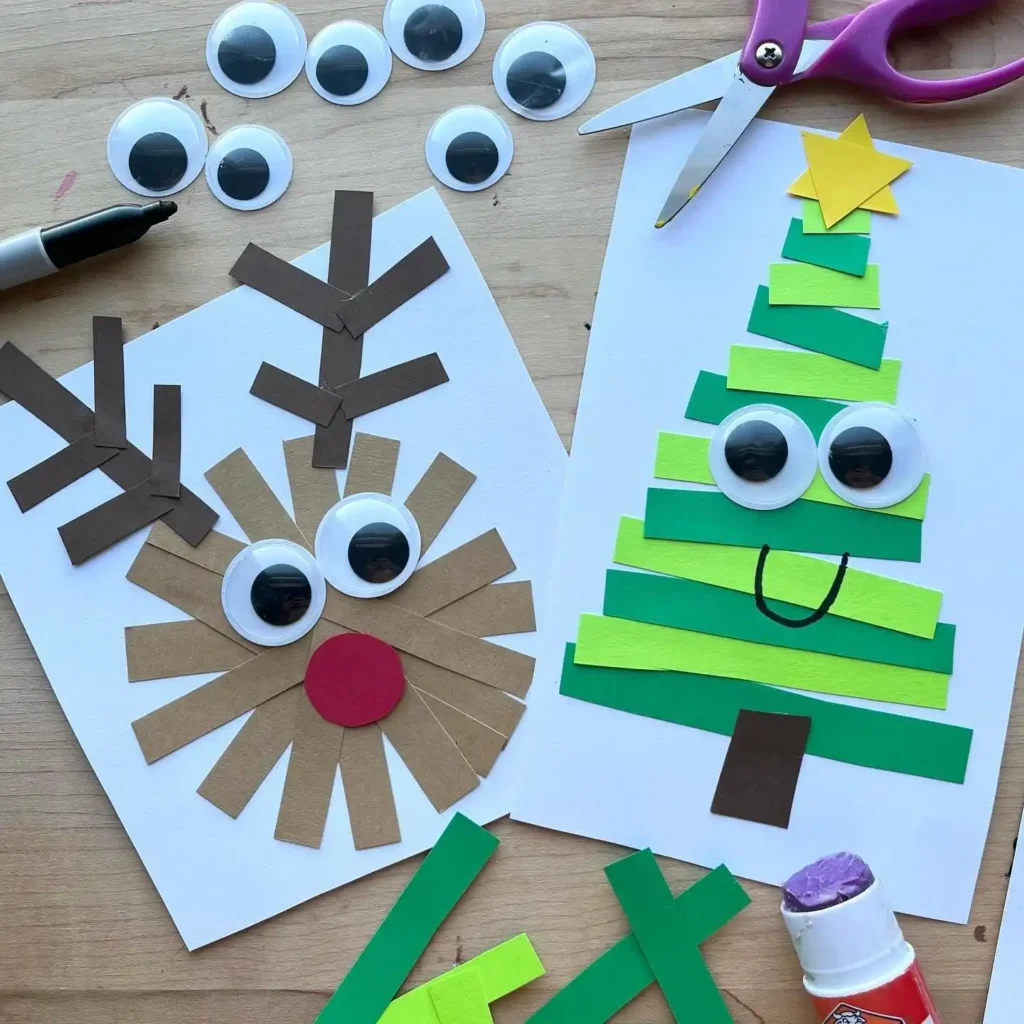
Straight strips of paper do all the shaping in these two cards. Green strips stack into a tree that gets wider toward the bottom, with a yellow paper star on top. Brown strips fan out around the reindeer face and form the antlers, and a red paper circle makes the nose. Big googly eyes give both of them a goofy face.
A toddler can lay strips onto a page covered in glue stick. For a baby, an adult does the sticking and the eyes.
What you need
Conclusion
Little hands change fast, and a Christmas card is a good place to keep the proof. Pick one of these baby christmas crafts, press a print while it still fits on the page, and write the date in the corner.
A handprint snowman or a wood slice ornament is an easy place to start. Save the pom pom tree and the paper strip cards for when a toddler or a big sibling can join in. Keep small parts like buttons and googly eyes in an adult’s hands.
If this list helped, save it to your Christmas crafts board on Pinterest so it is ready when the paint comes out.
Related reading
- Christmas activities for kids — eleven easy traditions to repeat every December
- Baby first Christmas ideas — outfits, photo setups and keepsakes to save
- Dollar Tree crafts for kids — eight low-cost fall projects
- Rainy day activities for kids — the full indoor ideas guide, sorted by age
Part of our complete guide
Everything in one place: the full Rainy Day Activities for Kids guide, with every related article.